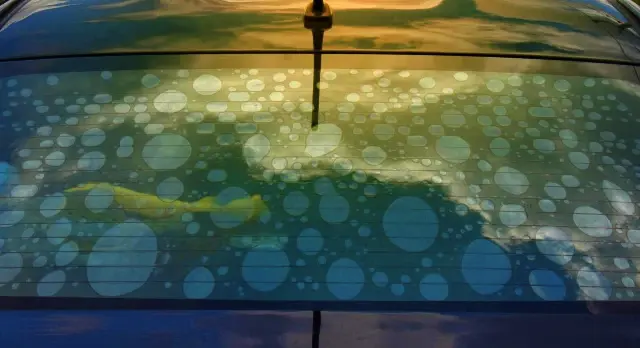
Are bubbles ruining the sleek appearance of your window tint? Don’t worry; you’re not alone. Window tint bubbles can be frustrating, but the good news is that they can be removed and prevented. In this comprehensive guide, we will walk you through the process of removing bubbles from window tint and share tips to prevent them from reoccurring. Say goodbye to those unsightly bubbles and enjoy a flawless window tint. Let’s get started!
Understanding Window Tint Bubbles and their Causes
Before we delve into the removal methods, let’s understand what causes window tint bubbles. Bubbles typically occur due to improper installation or environmental factors. Here are Common causes for occurring window tint bubbles:
- Inadequate surface preparation before installation.
- Trapped air or moisture during installation.
- Low-quality or expired tint film.
- Extreme temperature changes during or after installation.
Understanding the causes will help you address the issue effectively and prevent future bubble formation.

How Long Until Bubbles in Tint Go Away?
Many people wonder how long it takes for bubbles in window tint to disappear on their own. While some small bubbles may disappear over time, larger bubbles are unlikely to go away on their own. It’s important to take proactive measures to remove them and prevent further damage. The following sections will guide you through the process.
Methods to Remove Bubbles from Window Tint
There are several methods you can use to remove bubbles from window tint. Let’s explore them below:
1. Needle or Pin Method:
Sterilize a needle or pin using rubbing alcohol or a flame.
Gently poke the bubble with the sterilized needle, creating a small hole.
Use a soft cloth or squeegee to press the air out through the hole.
Smooth down the tint with the cloth or squeegee to ensure it adheres properly.
2. Heat Gun or Hairdryer Method:
Use a heat gun or hairdryer on low heat setting.
Hold the heat source a few inches away from the bubble and move it in a circular motion.
As the heat softens the tint, use a soft cloth or squeegee to smooth out the bubble, applying light pressure.
Continue heating and smoothing until the bubble is eliminated.
3. Professional Assistance:
If you are uncomfortable attempting the removal yourself or have extensive bubble issues, it’s best to seek professional assistance. Experienced tinting professionals have the skills and tools to remove bubbles effectively and ensure a flawless finish.
Preventing Window Tint Bubbles
Prevention is key when it comes to window tint bubbles. Here are some tips to help you prevent bubble formation:
- Choose high-quality tint film from reputable manufacturers to ensure durability and longevity.
- Clean the window surface thoroughly before installation, removing any dust, debris, or residue.
- Properly measure and cut the tint film to fit the window dimensions accurately.
- Apply the tint film in a controlled environment with moderate temperature and humidity levels.
- Use a squeegee or similar tool during installation to remove air pockets and ensure proper adhesion.
Key Takeaway
Removing and preventing bubbles from window tint is crucial to maintaining its aesthetic appeal. Whether you opt for the needle or pin method, heat gun or hairdryer method, or seek professional assistance, it’s essential to address bubble issues promptly. By understanding the causes and taking preventive measures, you can minimize the likelihood of bubble formation in the first place. Enjoy a flawless window tint and the enhanced privacy and aesthetics it provides!
Remember to exercise caution and patience during the removal process, and when in doubt, consult a professional for assistance.
How long does it take for new tint bubbles to go away?
The time it takes for new tint bubbles to disappear can vary depending on several factors, such as the quality of the tint installation, the type of film used, and environmental conditions. In most cases, small bubbles or water spots that may appear immediately after the tinting process will usually go away within a few days as the tint cures and the moisture evaporates. However, larger or more persistent bubbles may take a longer time to dissipate, potentially up to a few weeks.
Is it normal to have some bubbles after window tinting?
It is common to see some bubbles or small imperfections immediately after window tinting. These imperfections usually occur due to trapped air or moisture during the installation process. However, a professional tint installer will typically strive to minimize these issues and ensure a smooth and bubble-free finish. While some bubbles may be normal initially, they should diminish and disappear as the tint cures and any trapped air or moisture escapes.
How do you get rid of small air bubbles in tint?
If you notice small air bubbles in your window tint, there are a few steps you can take to address the issue:
Patience: In many cases, small air bubbles will disappear on their own as the tinting film cures and any trapped air escapes. So, it’s best to wait for a few days to see if the bubbles resolve themselves.
Applying heat: Gently applying heat to the affected area using a hairdryer on a low or medium setting can sometimes help the bubbles disappear faster. Be cautious not to overheat the film or use high heat, as this may damage the tint.
Contact a professional: If the bubbles persist or are large, it is advisable to contact the professional installer who applied the tint. They will have the expertise and tools to address the issue and ensure a satisfactory resolution.
Is it normal for tint to bubble after 2 weeks?
While it is not typical for window tint to bubble after two weeks, some factors could contribute to this issue. It could be due to poor installation techniques, low-quality tinting film, or excessive heat or moisture exposure during the curing process. If you notice bubbling after two weeks, it is recommended to consult a professional tint installer to assess the situation and provide appropriate solutions.
